


Introduction
This document will contain all necessary information for successful SIEM installation and upgrade. Search Head cluster installation is performed normally as for any other Splunk application that needs to be pushed through the deployer. Furthermore at the end of the document there will be a list of additional applications that can be implemented for SIEM clients in order to give them additional usability from SIEM and Splunk. The application will depend on the technologies used by the client so only install appropriate applications if there are available logs.
Minimum specifications for a production deployment
Infigo SIEM requires some minimum specification that you can increase according to your needs and usage. These specifications also apply to a single instance deployment of Infigo SIEM.
Review the following minimum system and hardware requirements before installing Infigo SIEM:
| Machine role | Minimum CPU | Minimum RAM |
| Search head | 16 CPU cores | 24 GB |
| Indexer | 16 CPU cores | 16 GB |
The minimum hardware specifications to run Infigo SIEM for search head cluster peers is the same as those required by standalone deployments.
After the installation of Infigo SIEM, make sure to change the setting for Relative concurrency limit for scheduled searches. Go to Settings → Server settings → Search preferences, and set the: "Relative concurrency limit for scheduled searches" to 75%.
Installation
The client should download all six of the SIEM related packets from Splunkbase. Only the person that was specified as license owner can download the applications.
- Infigo SIEM Toolkits
- Infigo Meerkat
- Infigo SIEM
- Infigo SIEM Content
- Infigo Threat Intelligence
- Infigo TA SIEM
All of the SIEM packets must be installed on the Search head. In case of the Splunk Search Head cluster, push all of the applications to SHC with a deployer.
Additionally install the application Infigo TA SIEM on the indexers. In case of an indexer cluster push the application to the IDX cluster using a Cluster Manager.
Additionally install the following applications:
- Infigo Additional Parsing
- Event Timeline Viz
- Network Diagram Viz
- Lookup Editor
- 3D Graph Network Topology Visualization
License Upload
In Infigo SIEM, on the navigation bar click on SIEM → Infigo licensing and upload the license that was provided to the client.
SHC NOTE: It is necessary to do this step on all of the SHC cluster nodes since the license file is not replicated.
General Configuration
Once the applications are installed go to the UI and click on Infigo SIEM. application. This will take you through the quick default configuration wizard, where additional applications will be required for installation and default configuration for installation/upgrade will be performed.
SHC NOTE: It is necessary to connect to every SHC instance and click on Infigo SIEM app in order to initiate app setup. The setup will be shorter now since it already finished on the first instance.
One the wizard finishes the job, General SIEM Settings page will be opened. In this section every configuration will be explained, and the recommendations for changing it:
SIEM alerts configuration
- SIEM alerts index: By default all alerts will arrive in this index, and this will be a Catch All index if there are some misconfigurations with multitenancy. Do not change this without Infigo PS.
- Close alerts older then: This setting will automatically put all alerts in closed status after 30 days if they were not classified in time.
SIEM tags configuration
- Allows the client to choose a default setting for tags in an Alert Review console. By default tags are not shown in the table in Alert Review console.
- During implementation it would be best if the tag are enabled.
Threat intelligence configuration
- global_intel.py - Script used to pull all of the different open source threat intelligence lists and combine them in a single list. Enable this if the instance has access to the internet.
- top_1m_intel.py - Script used to pull Cisco Umbrella 1 million list. Enable this if the instance has access to the internet.
All other settings are related to proxy. Only the clients that use proxy for accessing internet need to set this settings.
WIFI controller configuration
- soc_org_wifi_controller is a simple macro that specifies an index where the data from WIFI controller is collected.
DHCP Configuration
- Shows a lookup file with signatures that specify IP Lease and IP renewal. If the client is using something other then Microsoft DHCP in the environment, add the appropriate Event Codes to the table.
Additional configuration
- Shows links to the built-in docs that will specify the requirements for additional SIEM rules that require extra configurations to work that is usually requires help from the client.
Macro configuration
- In Infigo SIEM navigate to SIEM → Documentation → Alert Center → Manage SIEM Macros. Check all of the macros with a Mandatory Macro Change and change the value of the macro to appropriate value if needed through Splunk UI: Settings → Advanced search → Search macros
Data-model acceleration
- Based on the resources and available data in the client environment enable the acceleration of CIM data-models. This should be enabled if the client supports the hardware requirements for Infigo SIEM.
| Data Model | Acceleration Period |
| Authentication | 1 Month |
| Change | 1 Month |
| 2 Weeks | |
| Endpoint | 1 Month |
| Intrusion Detection | 2 Weeks |
| Malware | 2 Weeks |
| DNS | 2 Weeks |
| Network Session | 2 Weeks |
| Network Traffic | 1 Week |
| Web | 1 Week |
- For acceleration provided in the guideline take in the consideration that additional required disk space can be calculated by the following formula: License_Size * 1.5. For example acceleration for license size of 100 GB should not take up more then 150 GB.
- Based on the accelerated data-models change summariesonly* macros specified in infigo_sa_siem_alert_center, change the values from summariesonly=false to summariesonly=true.
- IMPORTANT: If acceleration is enabled it is required to add field source_tenant directly to the datamodel: Settings → Data Models → Chose the accelerated datamodel → Edit → Edit Dataset → Add Field → Auto Extracted → Add By Name. There will be two columns "Field Name", "Display Name". Add souce_tenant in bots fields and click save. At this point if acceleration is used in any dashboard, source_tenant needs to be prefixed with datamodel name. Example: Web.source_tenant.
Role Assignment
In order for users to have the ability to use Infigo SIEM, three roles have been devise. Make sure to assign this roles to appropriate users, do not inherit the roles.- infigo_siem_admin → User can do anything in Infigo SIEM
- infigo_siem_analyts → User has access to anything except for the configuration page
- infigo_siem_user → Users can't whitelist alerts and edit rules. Also they do not have access to some of the advanced features.
Important Note: Before assigning the roles above make sure to remove the old roles of the old version of Siem from the users, otherwise they will not be able to assign the alerts.
Configuring multitenancy MANDATORY
Infigo SIEM supports multitenancy and the feature is enabled by default since rules and dashboards are multitenant aware and require this information otherwise they would not work properly.In order for SIEM rules and dashboards to work, it is mandatory to introduce one indexed field called source_tenant. This indexed field needs to exist in every source that is collected in Splunk, and it can be created in a number of ways. Here we will cover few scenarios with different architectures.
Single instance architecture
In case of a Single Instance Splunk deployment, that does not have any Heavy Forwarders sending data from different organizations/tenants, the easiest and simplest solution is to simple create a new application with the following inputs.conf stanza:
Inputs.conf stanza[default]_meta = source_tenant::name_of_your_tenantThis stanza will tell all arriving data to add field source_tenant with the specified value. It is recommended to keep the naming simple. In case of Infigo, we would have a following stanza:
Inputs.conf stanza[default]_meta = source_tenant::infigo_productionThis will add a field source_tenant with a value infigo_production to every event.
Environment with two organizations sending data to a central Indexer cluster who is also a tenant
In this example we are having 3 companies: Infigo Central, Infigo West, and Infigo East. Infigo West and Infigo East are sending data to Infigo Central for log storage and security monitoring by MSSP.
In order to distinguish the SIEM alerts that are triggering, every organization will be a tenant. Here is an example architecture diagram for the provided example.
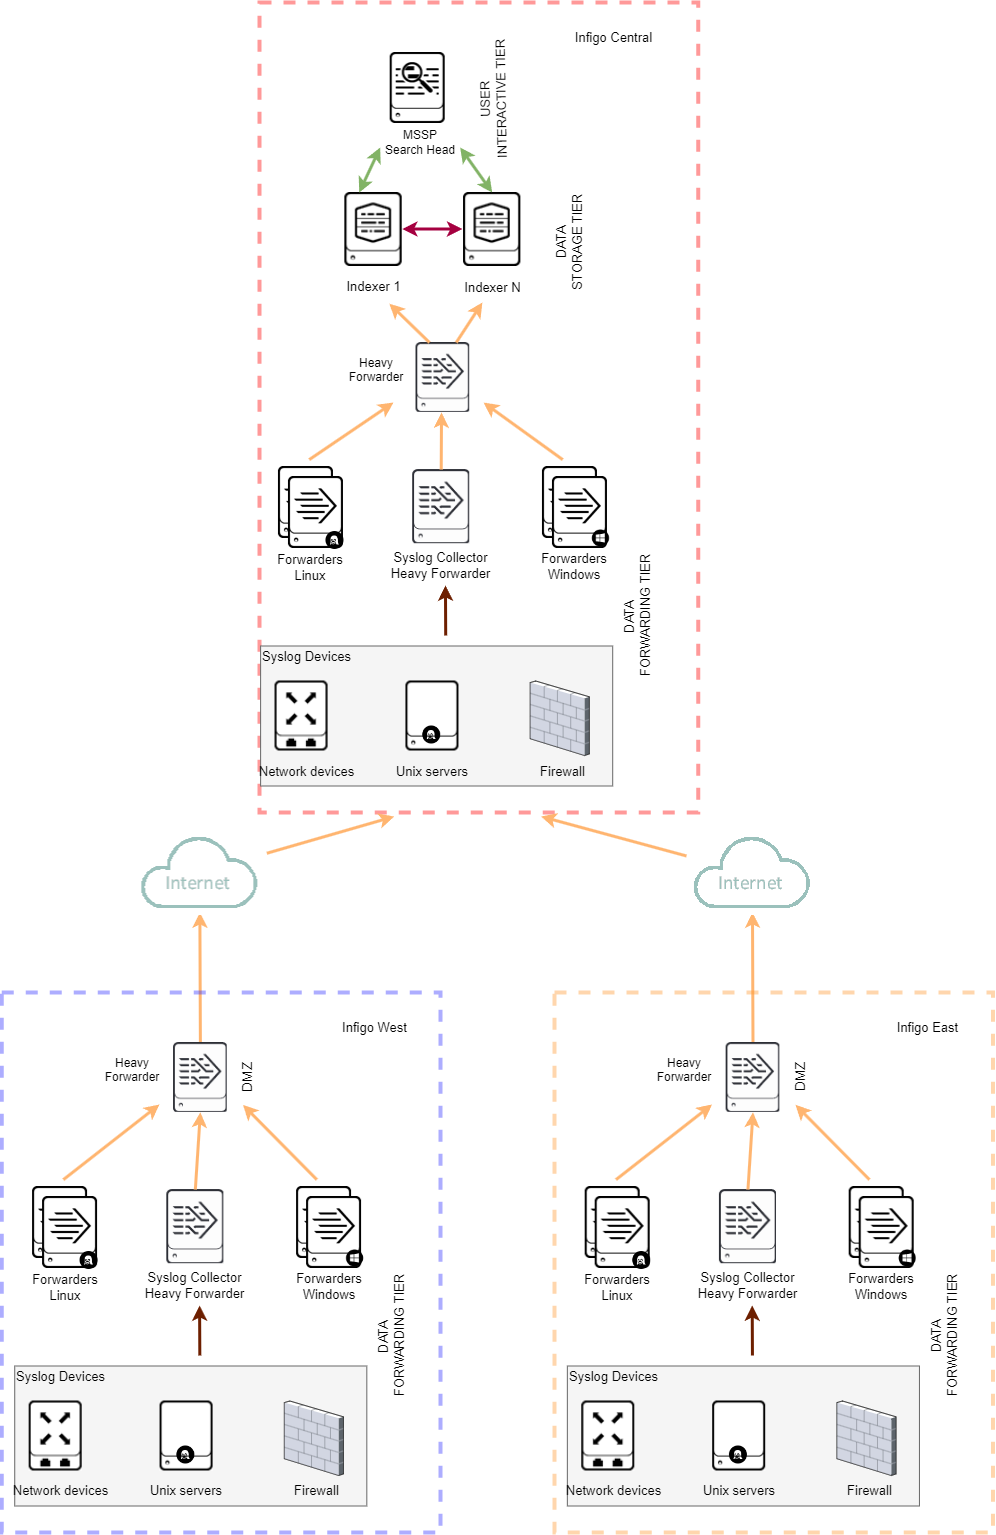
On Heavy Forwarder in Infigo East the inputs.conf configuration would be:
Inputs.conf stanza[default]_meta = source_tenant::infigo_eastOn Heavy Forwarder in Infigo West the inputs.conf configuration would be:
Inputs.conf stanza[default]_meta = source_tenant::infigo_westOn Heavy Forwarder in Infigo Central the inputs.conf configuration would be:
Inputs.conf stanza[default]_meta = source_tenant::infigo_centralHeavy forwarder in Infigo Central is necessary because adding default inputs.conf stanza on indexers would result in duplication of sorce_tenant fields for Infigo East and Infigo West. So the data from Infigo East would have "infigo_east" and "infigo_central" as value in source tenant.
If having a Heavy forwarder is not an option in Infigo Central, it is possible to remove it, but in that scenario all forwarders and other inputs in Infigo Central need to have _meta stanza for every host that is sending data. This is easy for Forwarders since you can simply push the [default] stanza to them with Deployment server.
Environment with two organizations sending alerts to a central Indexer cluster who is also a tenant
In this example again we have three organization but each of them have their own SIEM instance that is running the alerts, but central SOC is in Infigo Central, so the Infigo West and East will forward only the alerts to the Infigo Central.
This architecture requires a setup procedure as described for the single instance for each organization. Alerts that arrive in Infigo Central will already have a field source_tenant from the sister organizations and everything will work as intended.
This architecture increases the difficulty for investigation on the sister companies since the central SOC does not have access to the underling data. This can be mitigated by implementing federated searching. More about that can be read in official Splunk documentation.
Configuring SIEM multitenancy indexes MANDATORY
In order to maintain separation of alerts based on tenant it is mandatory to define an index for each tenant. Index definitions MUST exist on both SIEM Search Head and Indexers.
Indexes MUST be named in the following manner:
In our example above, that would relate to:
- infigo_central_siem_alerts
- infigo_west_siem_alerts
- infigo_east_siem_alerts
This index definitions need to exist on both Search Heads and Indexers.
In case of the architecture where only the alerts are being forwarded to central SOC, make sure that the alerts for appropriate tenant arrive in the corresponding index.
IMPORTANT: All index names must be in lowercase format because while handling indexes with REST, Splunk does not know the difference between indexes with uppercase and lowercase letters.
Enabling and configuring SIEM rules
IMPORTANT:
Make sure to set the macro soc_current_tenant to the correct value. The value needs to be the same as in _meta for data inputs.
Most of the SIEM rules and dashboard are leveraging CIM datamodels for searching the data. Make sure that all of the security data is mapped to CIM datamodels in order to get maximum information from your SIEM.
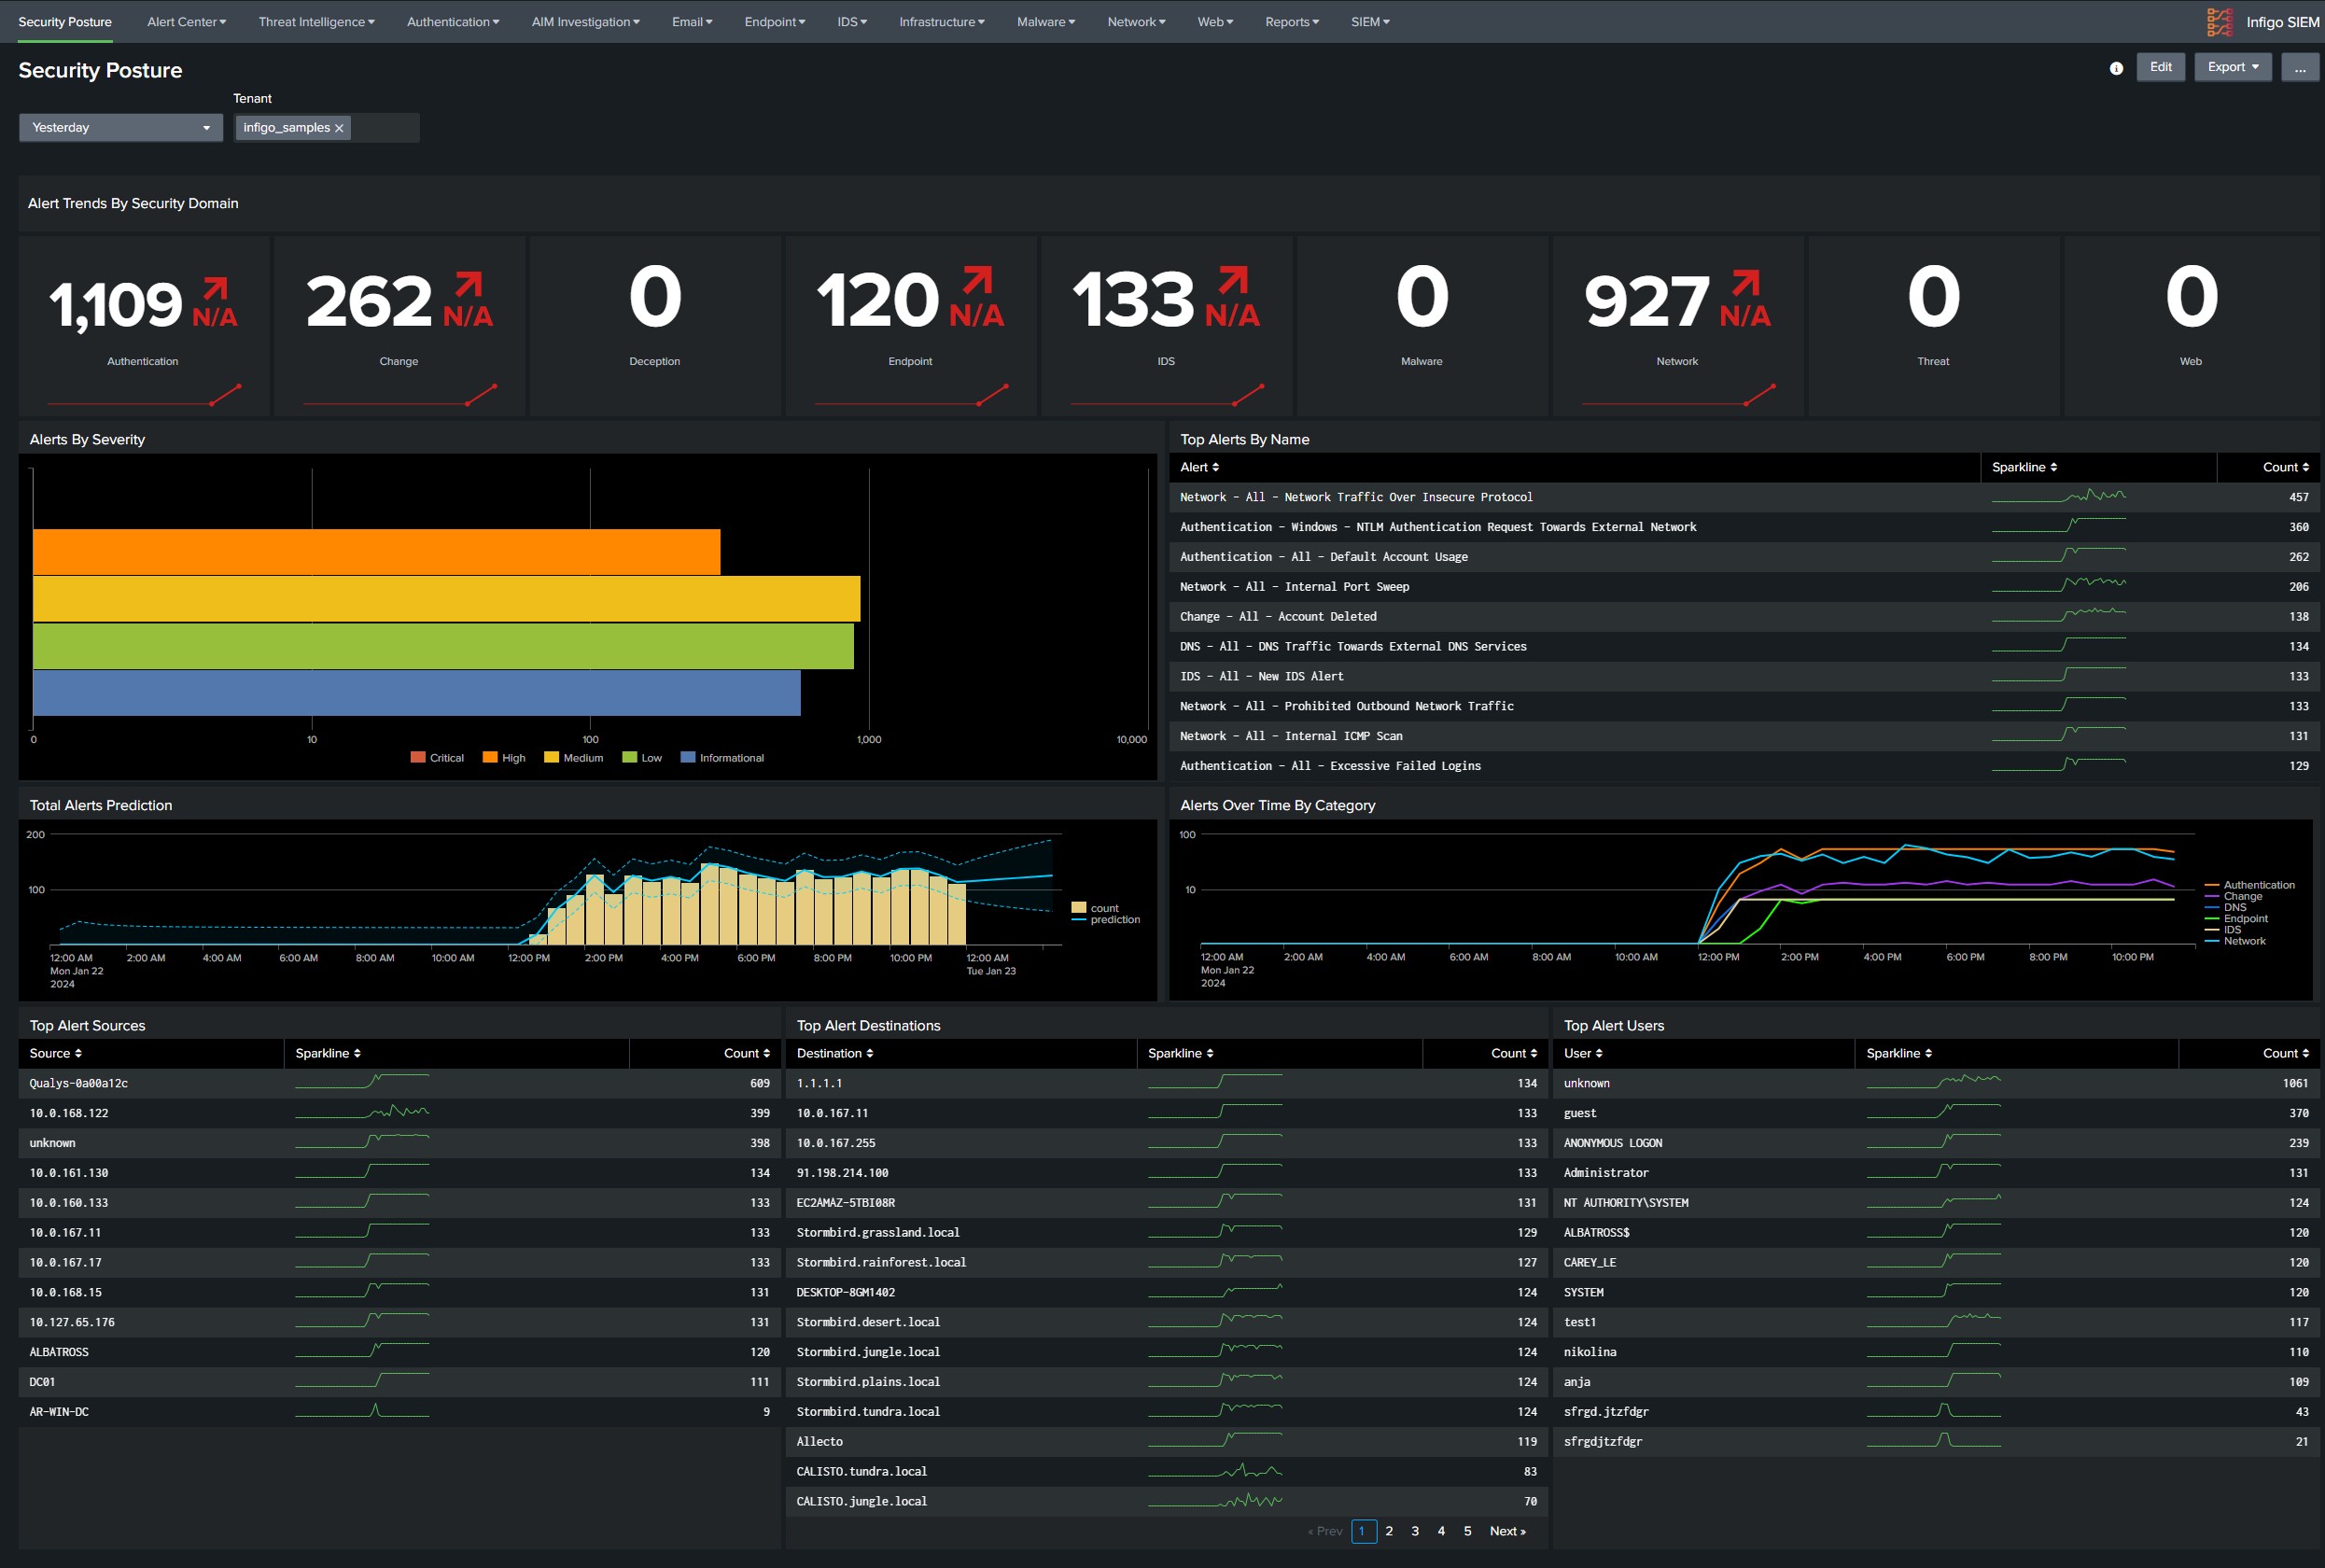
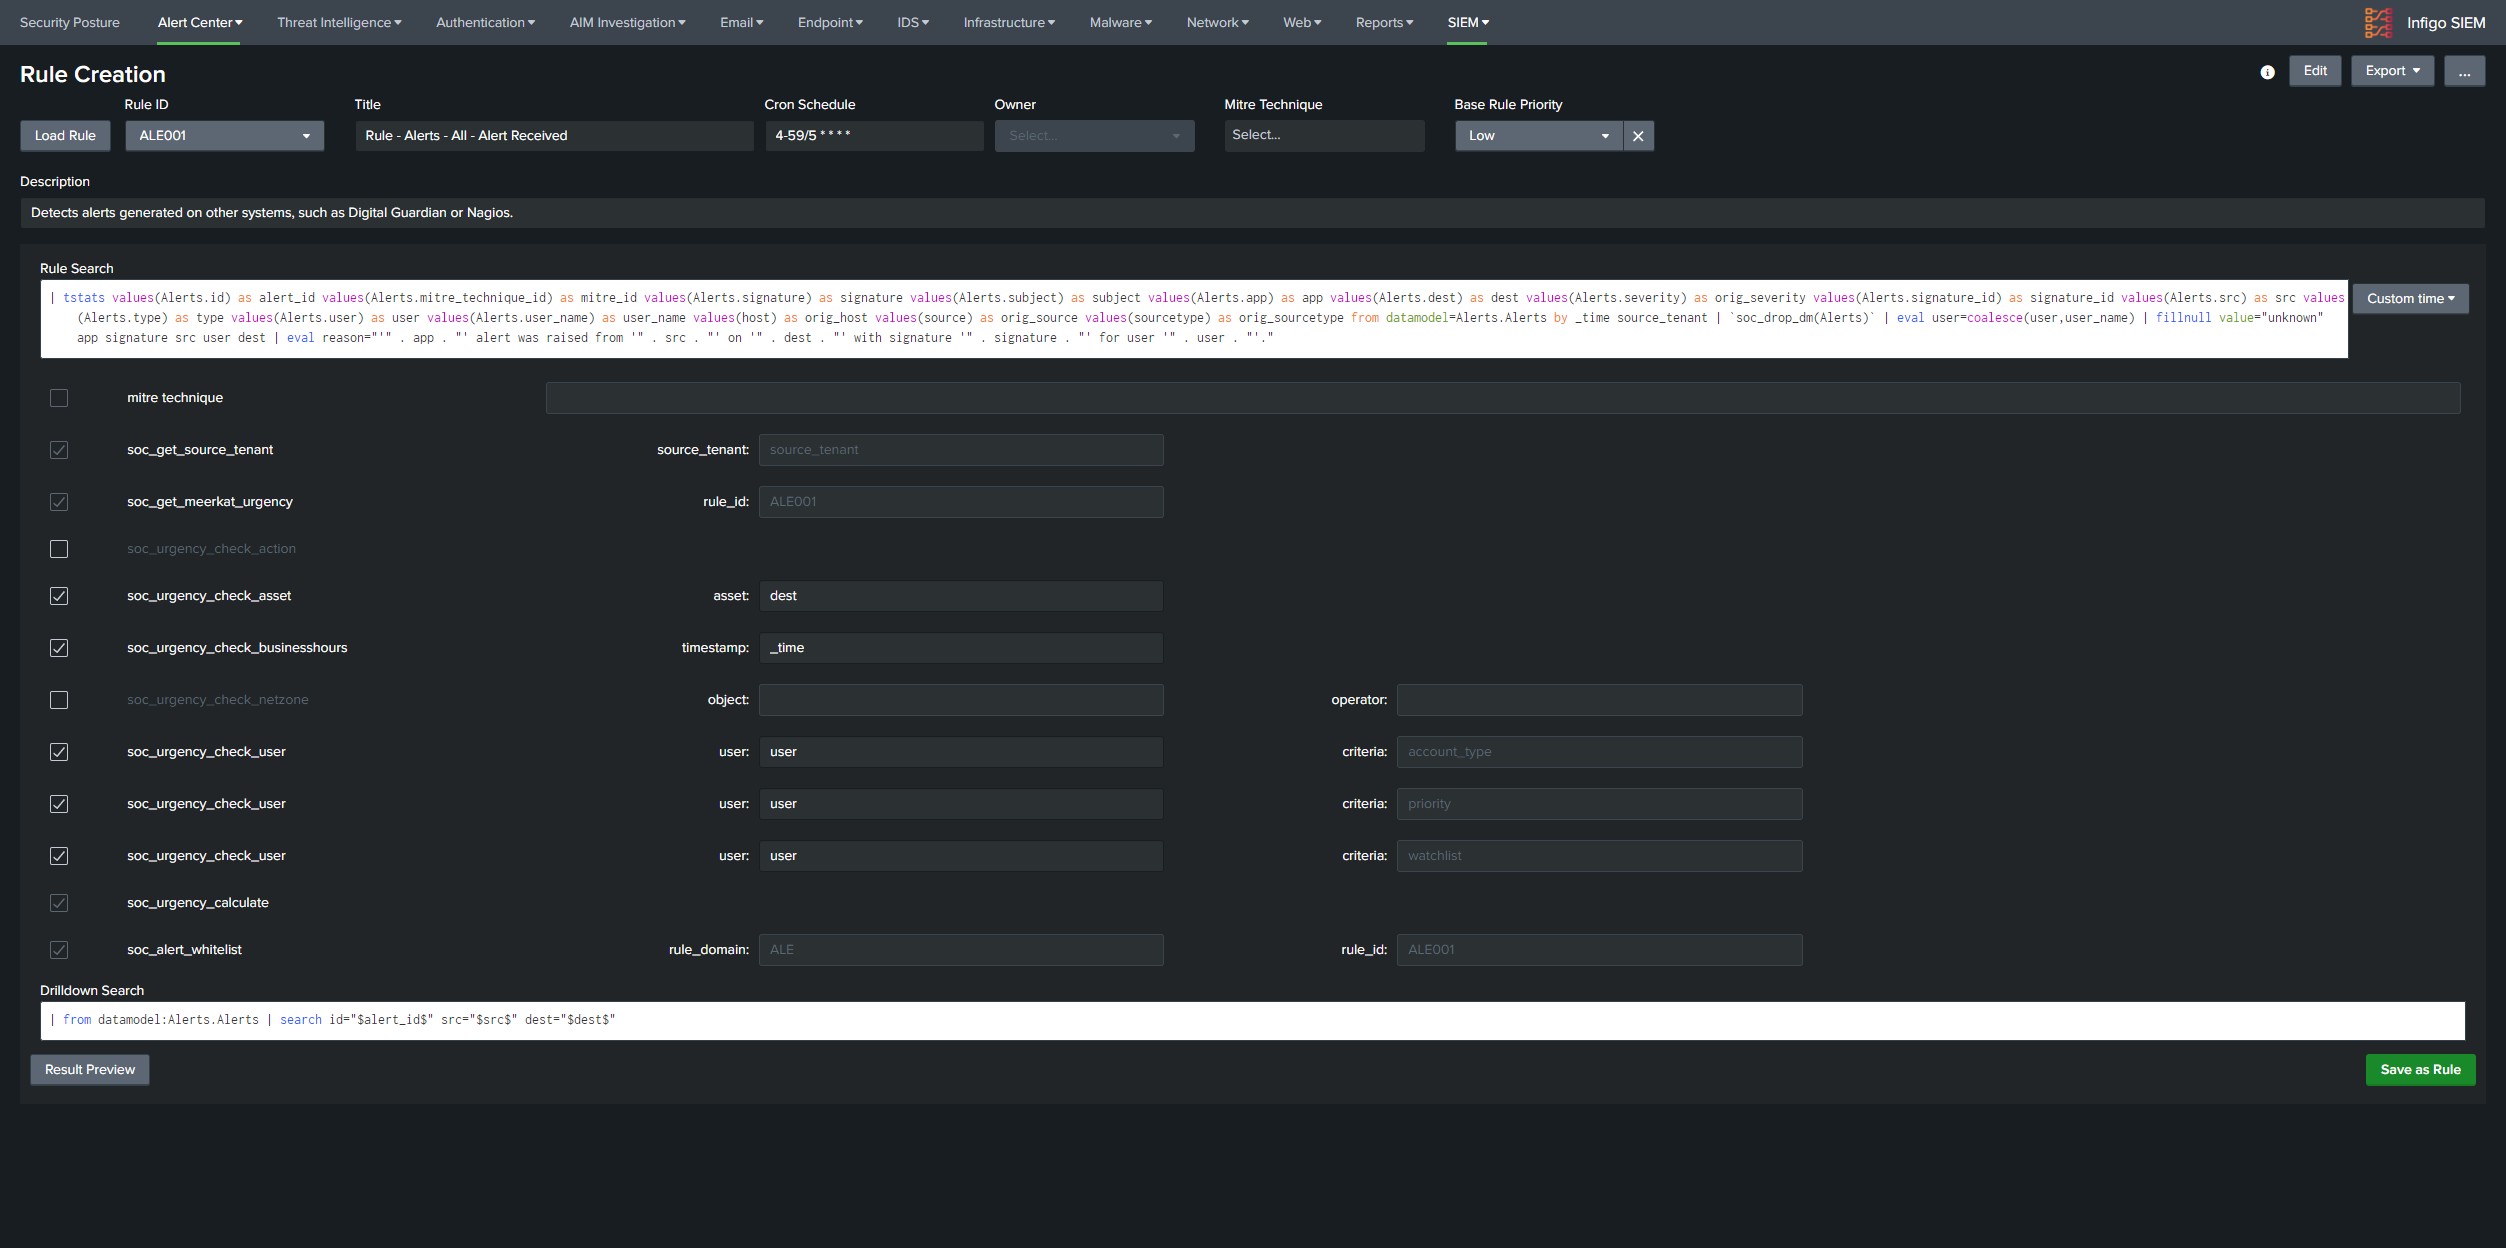
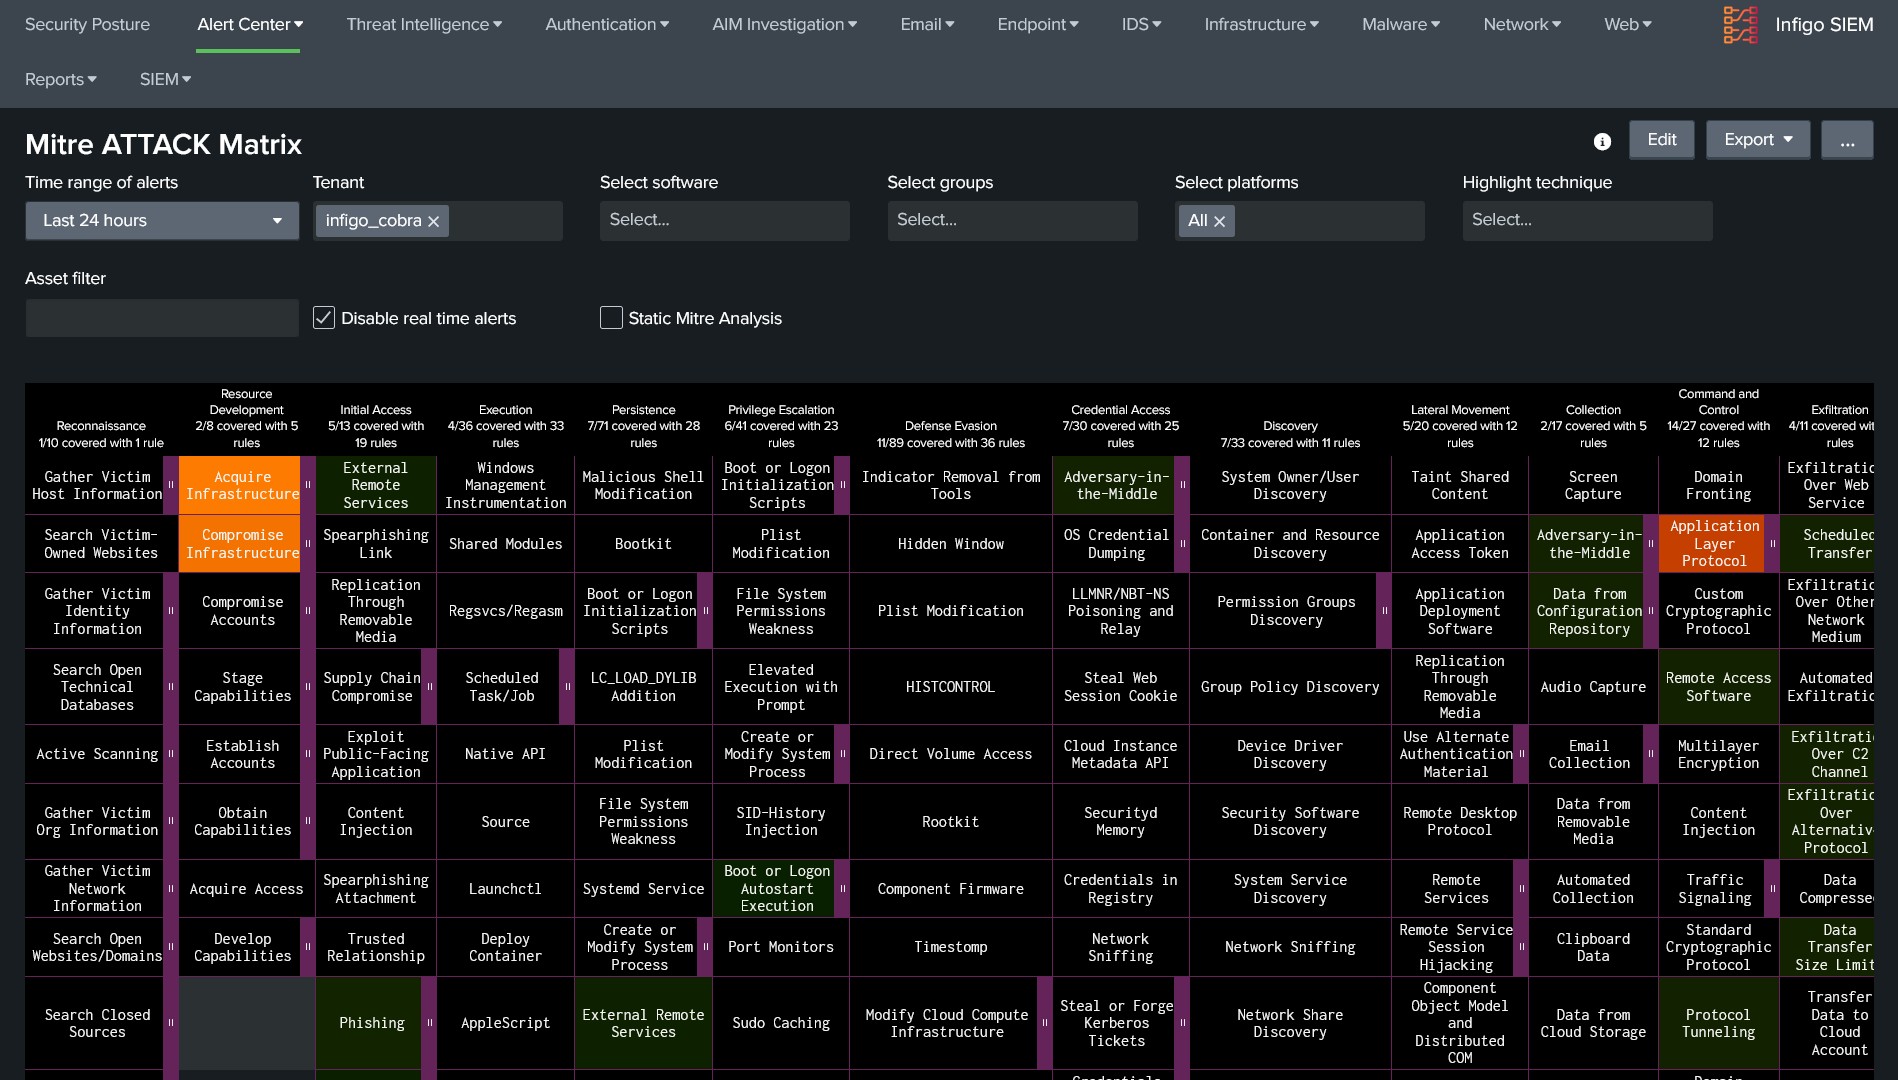
List of SIEM rules is available in Infigo SIEM → Alert Center → Rule Manager. Information about required log sources for specific rules are available in built-in documentation in Infigo SIEM navigate to SIEM → Documentation → SIEM Rules, where every rule is documented under its appropriate security domain. Enable the rules based on available log sources in the client environment. There are searches in infigo_sa_siem_content that begin with prefix Lookup Gen, this indicates that this search is generating a lookup table for specific rule, and those are enabled by default.
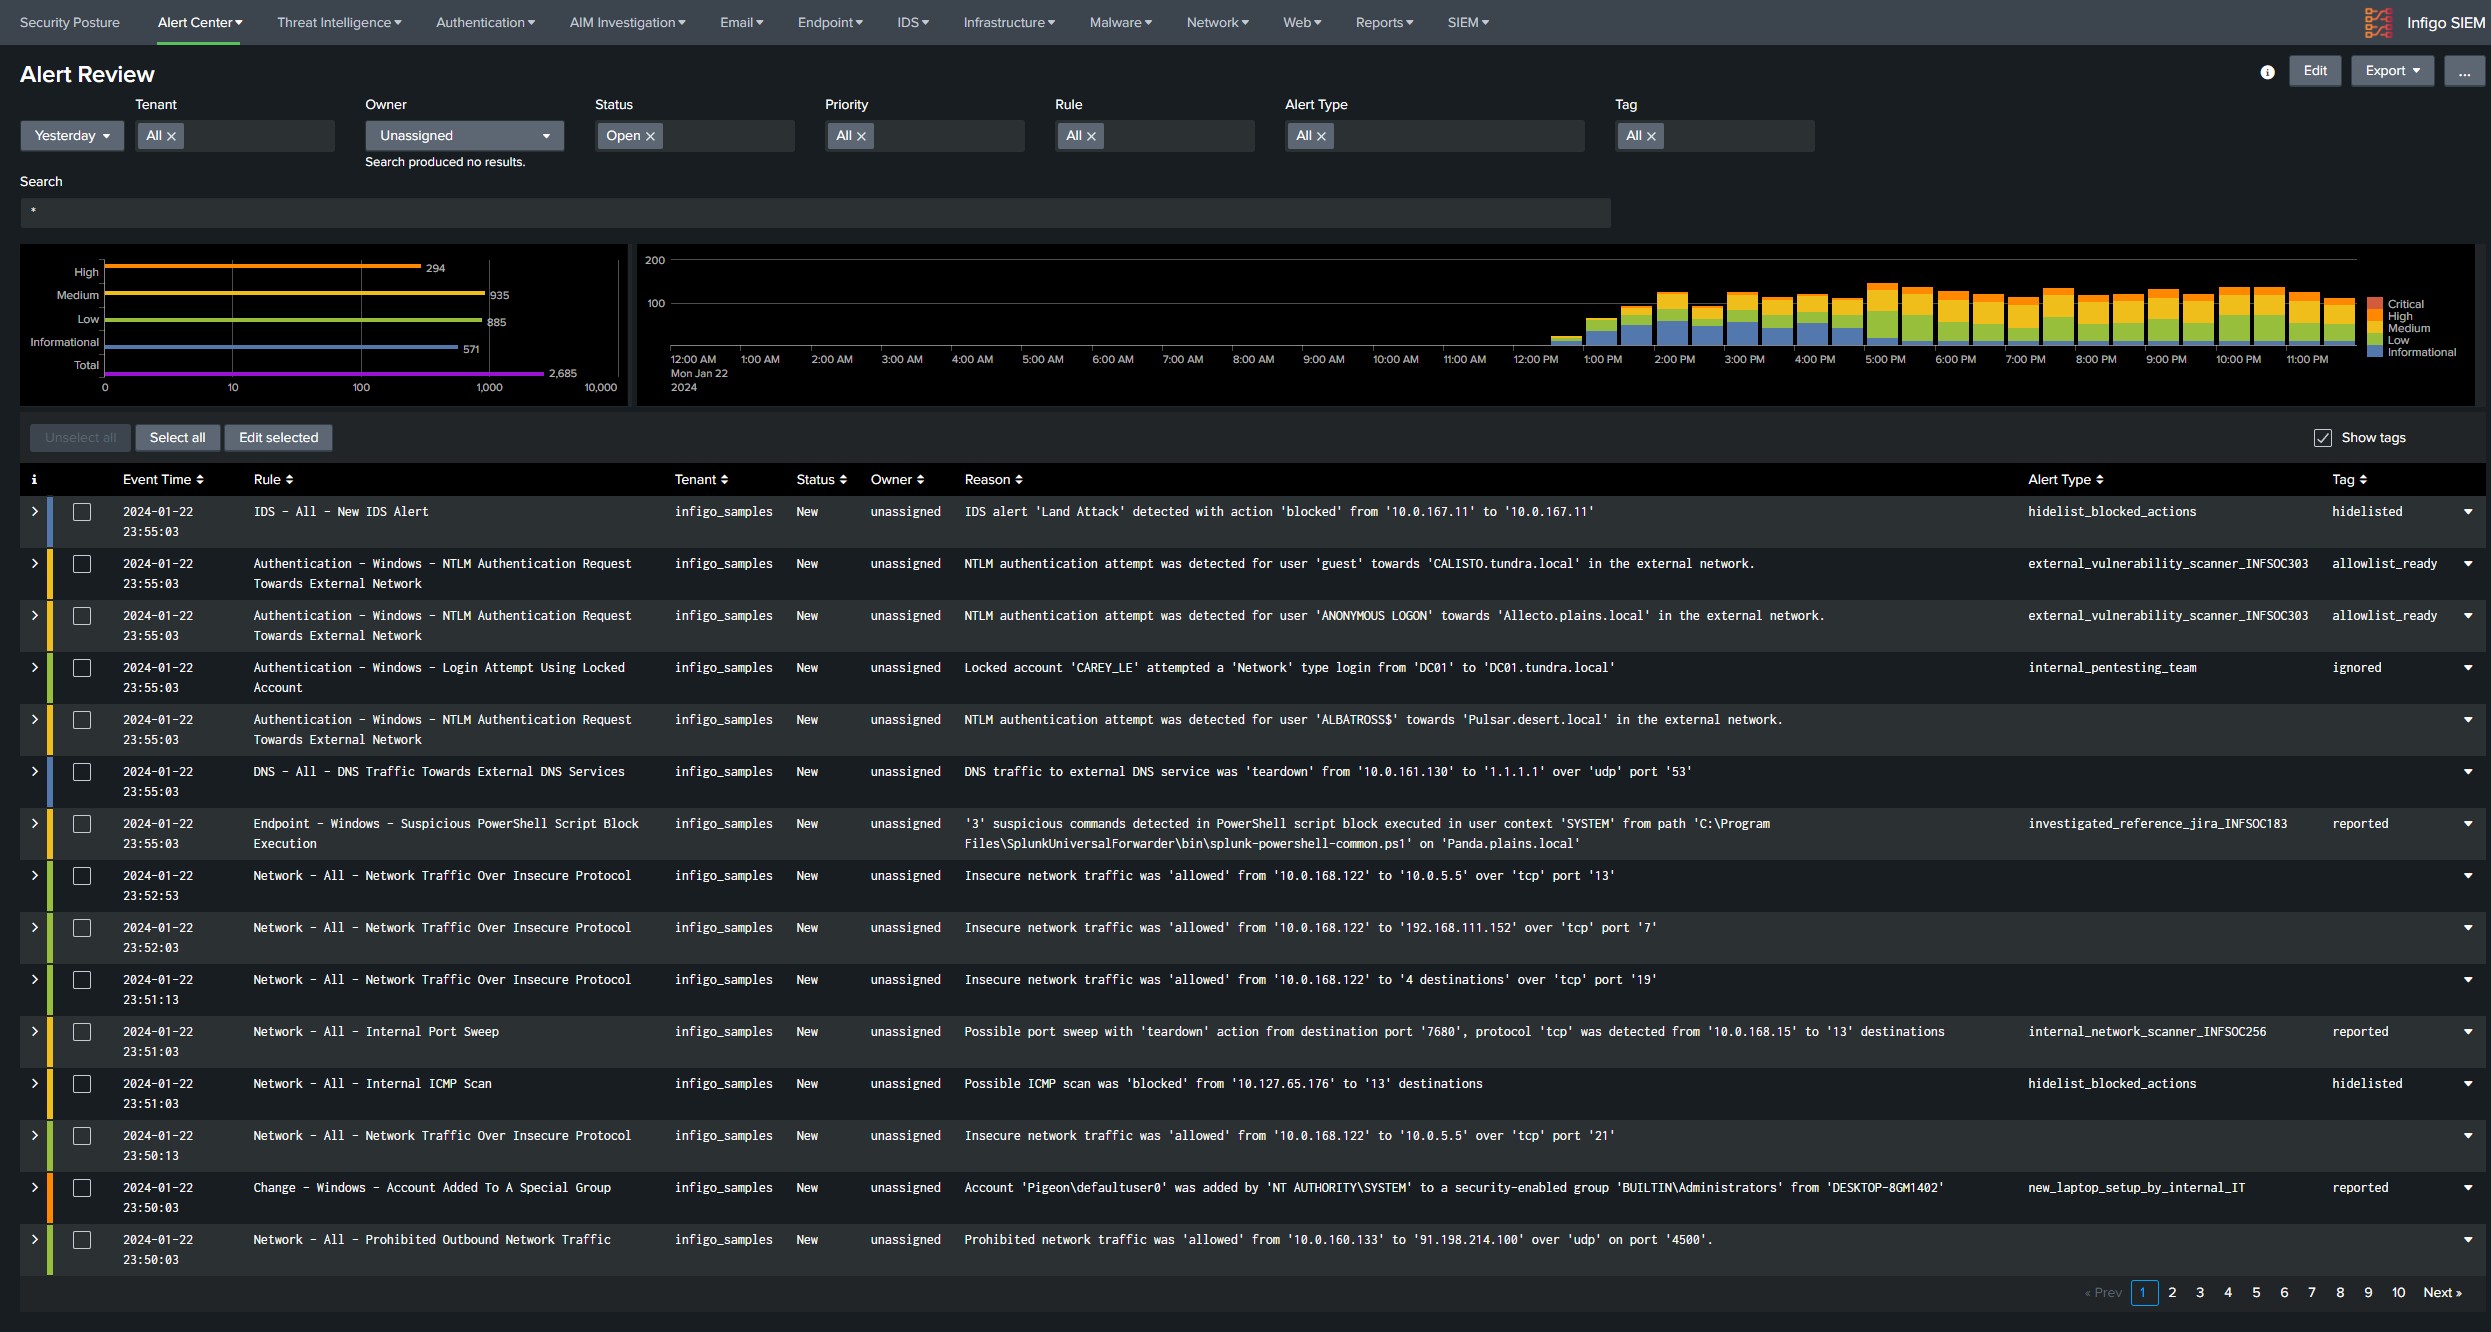
Once the rules are running find noisiest rules and perform whitelisting of false positives, if the alert generates more then 500 alerts daily it can be considered a good candidate for whitelisting. Good place to see which combination of results is generating highest number of alerts would be SIEM Incident Audit dashboard available under SIEM tab in navigation bar. Under the panel Most Active Rules Split by Asset there are rules with common noisy field values, if the values indicate that this is an false positive perform allowlisting through the Alert Console. Whitelisting process is described in documentation SIEM → Documentation → Alert Center → Allowlist false positive alerts. Some alerts may be harder to whitelist where clients assistance will be required to determine if specific behavior is expected in the environment.
Operational Rules
In order to enable all operational rules there are some prerequisites. All of the rules that specify distributed groups need to have correct distsearch.conf configuration.
- Configure the Monitoring Console in Single or Distributed mode, if you are configuring the MC in Single instance mode, on the setup page you need to click apply configuration otherwise the correct distributed search groups are not being created in distsearch.conf.
- On search head where SIEM is configured and this module will be used, add all instances as search peers as if you are configuring the MC.
- Copy the content of $SPLUNK_HOME/etc/system/local/distsearch.conf from correctly configured monitoring console in $SPLUNK_HOME/etc/apps/infigo_sa_siem_content/local. Check the distsearch.conf that has been copied. If the MC has more Splunk server roles, distsearch.conf will need to be updated since under the stanzas for that specific role the value will be localhost.localhost since its performed by MC.
- Restart Splunk
Example for step 3. Taken from MC that also performs a role of a DS
[distributedSearch]servers = https://10.223.37.57:8089,https://10.223.37.77:8089,https://10.223.37.94:8089,https://10.233.16.23:8089,https://10.233.16.27:8089,https://10.233.17.230:8089,https://10.233.17.231:8089[distributedSearch:dmc_group_deployment_server]servers = localhost:localhost -> NEEDS TO BE CHANGED TO THE ADDRESS OF THE MONITORING CONSOLE SINCE THE MC PERFORMS A DS ROLE[distributedSearch:dmc_group_cluster_master]servers = 10.233.17.230:8089[distributedSearch:dmc_group_license_master]servers = 10.233.17.230:8089[distributedSearch:dmc_group_search_head]servers = 10.233.17.231:8089[distributedSearch:dmc_group_indexer]default = trueservers = 10.223.37.57:8089,10.223.37.77:8089,10.223.37.94:8089,10.233.16.23:8089,10.233.16.27:8089[distributedSearch:dmc_group_shc_deployer]Collecting asset and identity data
Infigo SIEM supports both automatic and static collection of asset information. In Infigo SIEM in navigation bar go to SIEM → Documentation → Automatic Collection of Asset and Identity Data to find all different ways to collect asset and identity data in Splunk. Implement as many collection methods specified in the document as this will make asset data as precise as possible. This document will reference three applications that can be pushed to forwarders for data collection. Please download them here: asset_discovery_suf_apps.zip.
IMPORTANT NOTE: In application Splunk Supporting Add-on for Active Directory make sure to name the configuration name is the same as value in source_tenant. Also keep in mind that if the client only has "default" configuration, you need to rename it to the source_tanenat value.
After all of the desired implementation methods have been implemented there is a possibility that based on the order there will be noise in User and Asset tracking data. In order to make sure that all information is correct in the asset in identity tables perform the following steps:
- Make sure that there is a valid AD connection configured in Splunk.
- Run the following searches in order:
- Lookup Gen - IAM - Windows - Get AD Assets
- Lookup Gen - IAM - Windows - Get AD Identities
- Wait previous to finish
- Lookup Gen - IAM - Identities - Merge Identities
- Lookup Gen - IAM - DHCP - New Hosts On Network By MAC
- Lookup Gen - IAM - DHCP - New Hosts On Network By DNS
- Wait previous to finish
- Lookup Gen - IAM - Asset Summary Last 180 Days
- Empty the following lookups:
- soc_rdp_windows_connection_tracking
- soc_user_login_tracker
- soc_org_assets_sysmon_current_network_information
Make sure that the Wifi Controller data is being parsed if its collected in environment:
Two required fields are:
- src_mac
- user
Search that compiles the Wifi Controller data is:
- Lookup Gen - IAM - Wifi - Hosts Authenticating To Wifi
Infigo SIEM provides a "Siem Assets" datamodel. If there is a need to add any asset data that needs to be processed by SIEM, simply map the asset data to the datamodel.
Vulnerability Management
Infigo SIEM provides a SIEM Vulnerabilities datamodel where information from any client vulnerability module can be mapped to datamodel and consumed by Infigo SIEM.
In order to manage vulnerabilities per specific teams or individuals read the Vulnerability documentation under:
- Built-in documentation in Infigo SIEM, navigate to SIEM → Documentation → SIEM Dashboards → Vulnerability Analytics.
Implementation Validation
- Once all data has been onboarded and normalized to CIM go through every SIEM dashboard and note if any panel is not working. If its for any other reason then the lack of data or bad parsing report the problems to siem@infigo.is.
- Specifically verify every dashboard available under AIM Investigation in the navigation menu. All of the searches responsible for those dashboards are under Infigo SIEM application.
- Navigate to the dashboard Identity Investigation. Check few users under field Owns Machine there should not be a domain controller, if there is make sure to redo the step Collecting asset and identity data
- Verify that assigning of alerts works in Alert Review console.
- Verify that the following tables have data, and if they do not troubleshoot why there is no data.
| Lookup Table | Filled By |
| soc_org_assets | Created by search Lookup Gen - IAM - Asset Summary Last 180 Days |
| soc_org_assets_ad | Requires configured Splunk Supporting Add-on for Active Directory |
| soc_org_assets_nmap | Requires collected NMAP data as described in Collecting asset and identity data |
| soc_org_identities | Created by search Lookup Gen - IAM - Identities - Merge Identities |
| soc_org_identities_ad | Requires configured Splunk Supporting Add-on for Active Directory |
| soc_org_networks | Created by search Lookup Gen - IAM - Network - Merge Network Zone |
| soc_org_network_agents | Requires collected data from Splunk agents as described in Collecting asset and identity data |
Providing additional value to SIEM implementations
It is recommended to provide a customer with additional content with SIEM integrations in order to enrich the usage of Splunk and Infigo SIEM.
Here are the list of applications that can be installed additionally to the client environment in order to enrich usage of Splunk and SIEM based on the ingested data:
| Application | Ingested Data |
| Blue team app for Office 365 and Azure | Azure Audit Logs and O365 Message Trace |
| Splunk Dashboard Examples | Any |
| Palo Alto Networks App for Splunk | Palo Alto |
| Fortinet FortiGate App for Splunk | Fortinet |
| Cisco Networks App for Splunk Enterprise | Cisco |
| Boss of the SOC (BOTS) Investigation Workshop for Splunk | Any |